Show a column on the vehicle
A column starts in the grid only. One checkbox also puts it on the vehicle form and the vehicle’s page. The grid and the vehicle hold the same value, so a change in one shows in the other.
For a new column
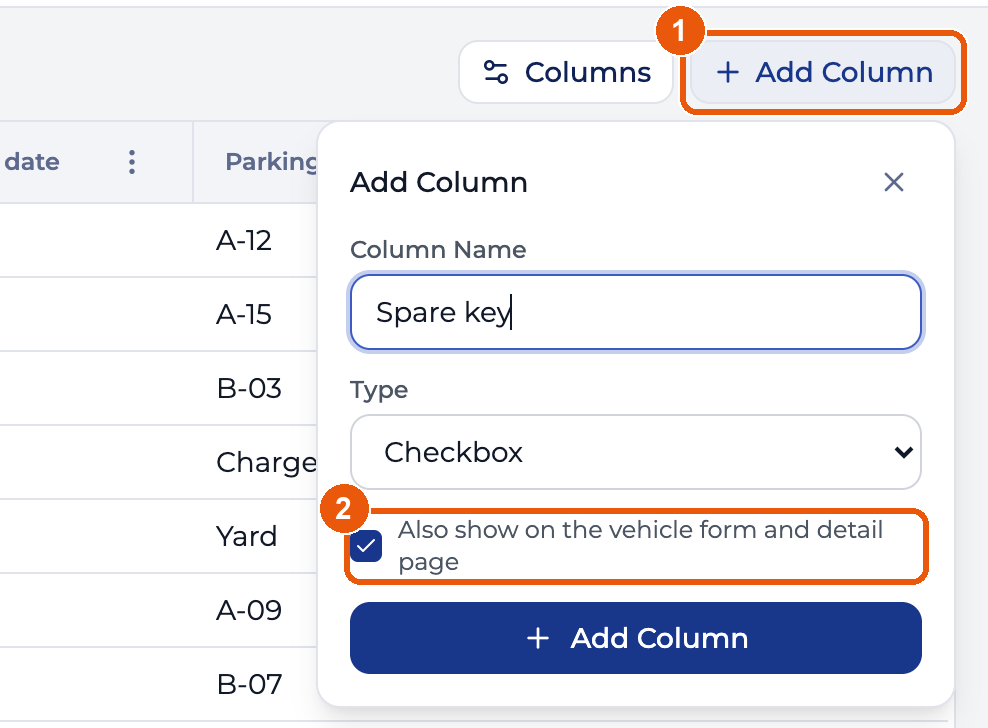
When you add the column, tick Also show on the vehicle form and detail page, marked 2 in the screenshot.
For a column that already exists
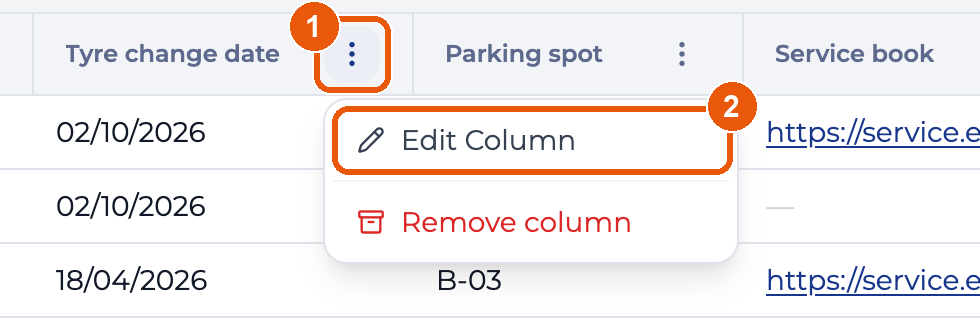
- In the grid, click the ⋮ at the right edge of the column’s header.
- Choose Edit Column.
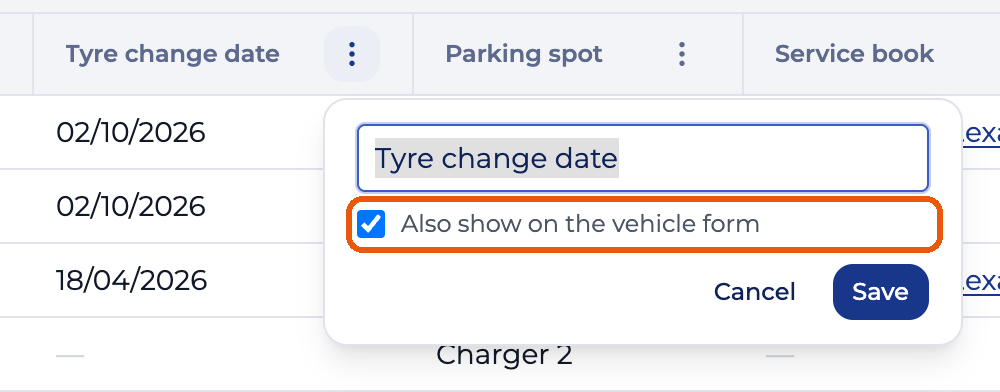
Tick Also show on the vehicle form and save. Values already in the column come with it.
Untick the same box to take the column off the vehicle again. Its values stay in the grid.
Where it shows up
On the vehicle form
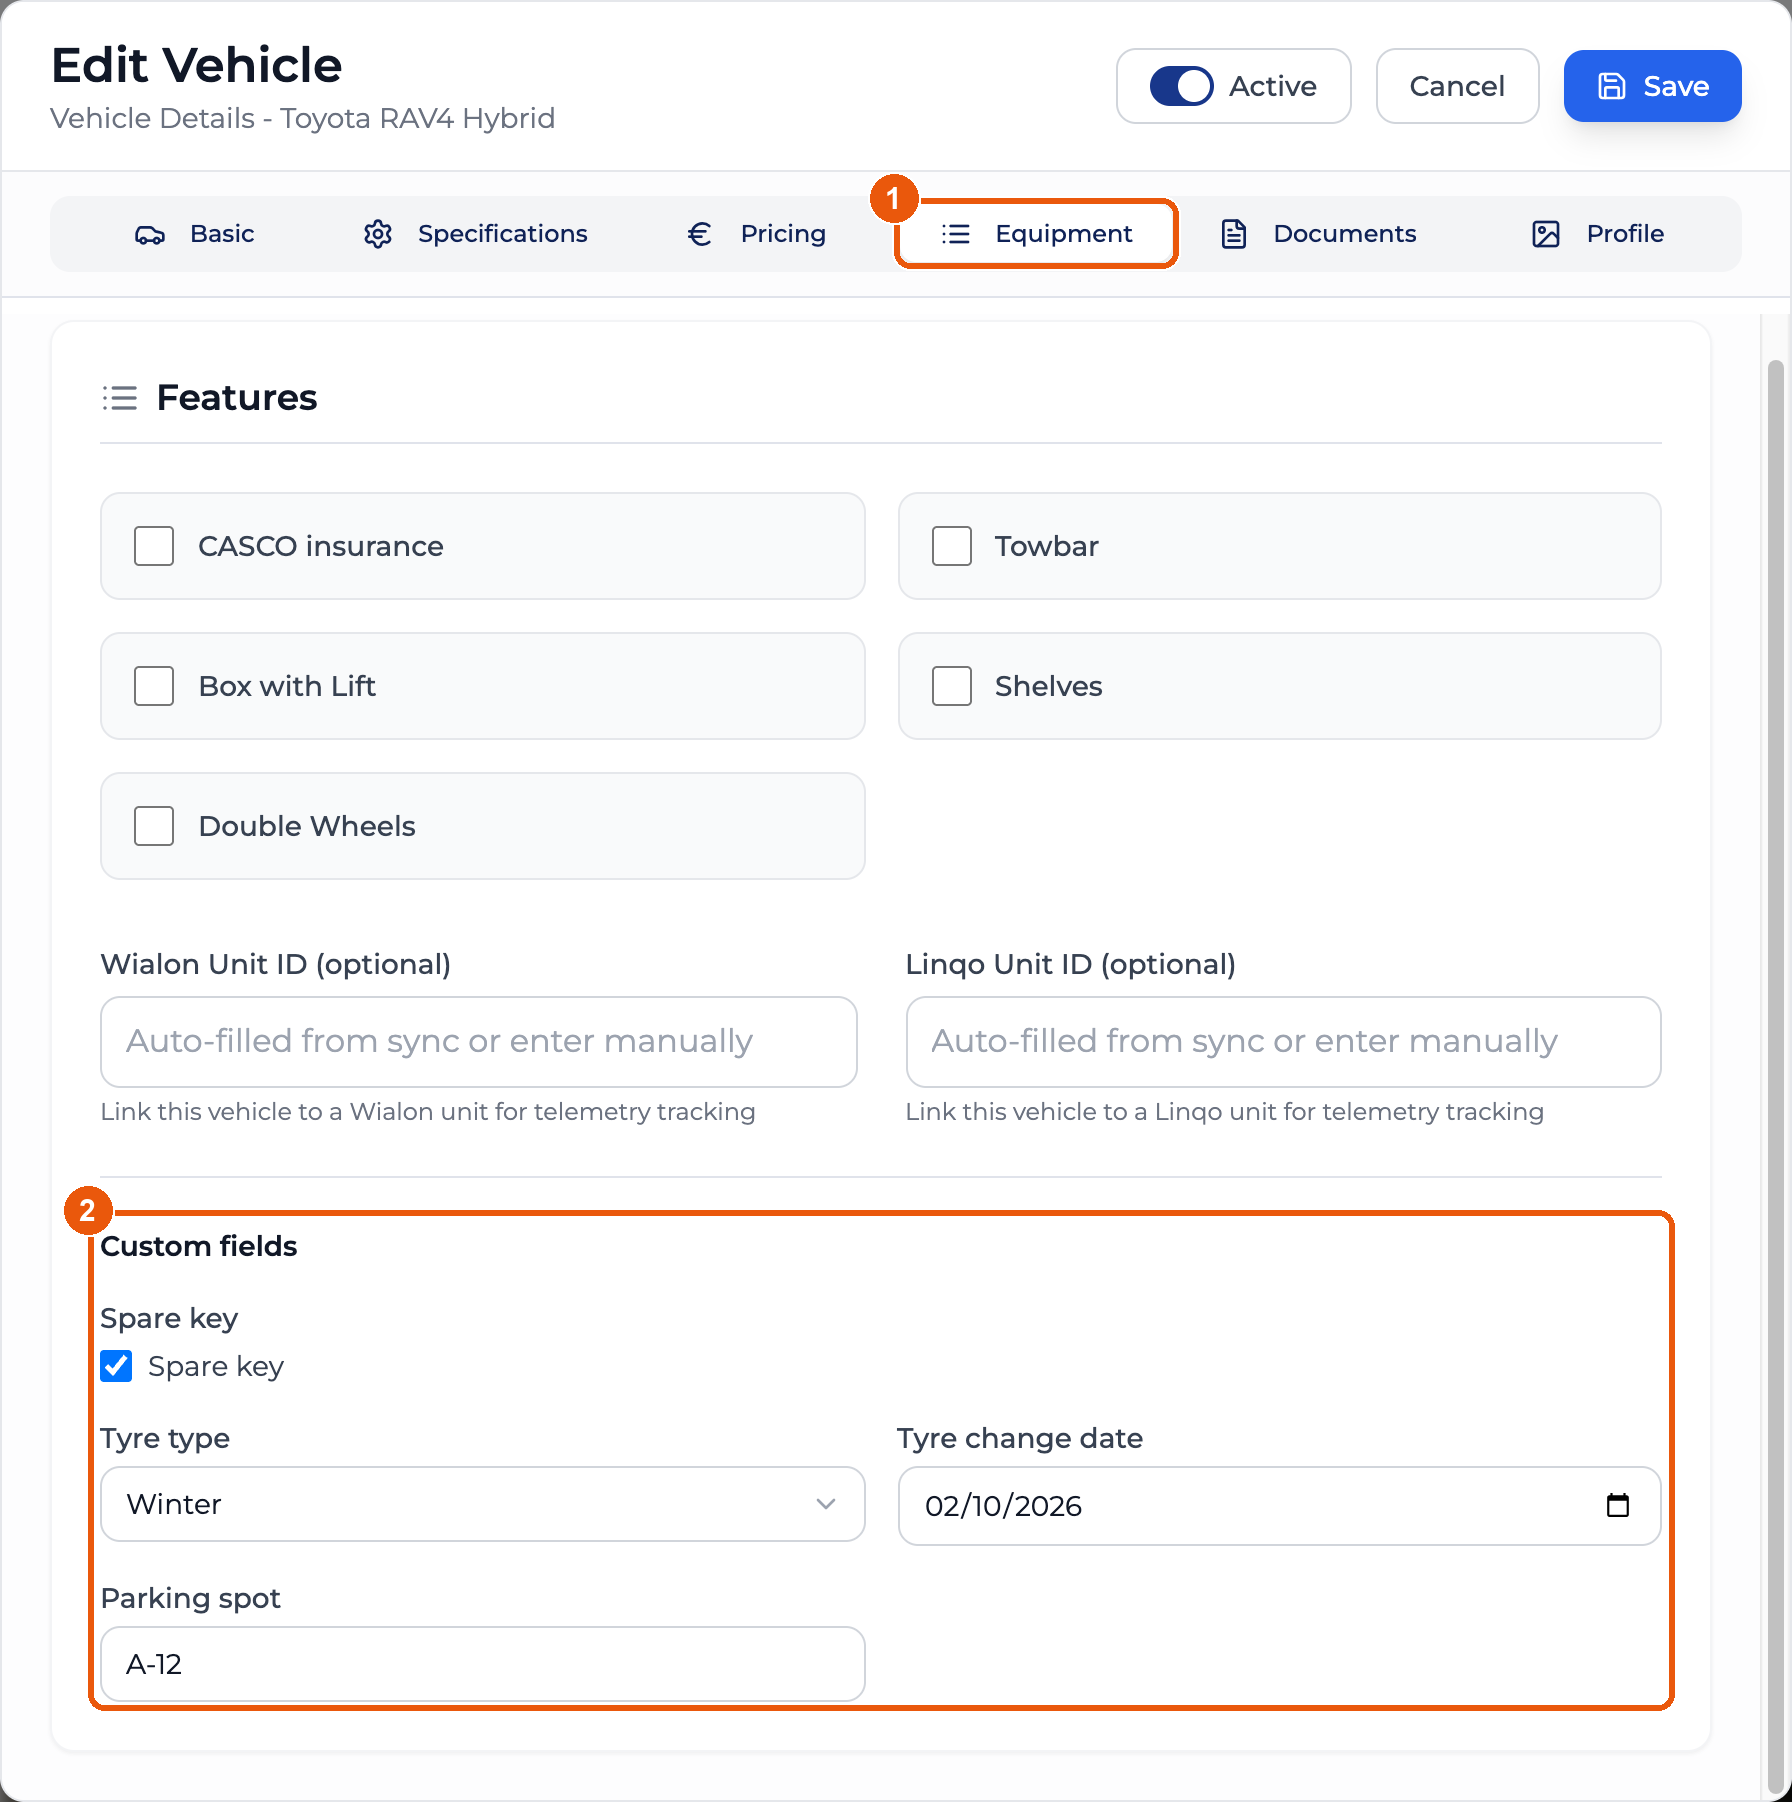
- In Edit Vehicle or Add Vehicle, open the Equipment tab.
- Scroll to Custom fields at the bottom.
To edit a value from the vehicle instead of the grid, change it here and click Save at the top of the window.
On the vehicle page
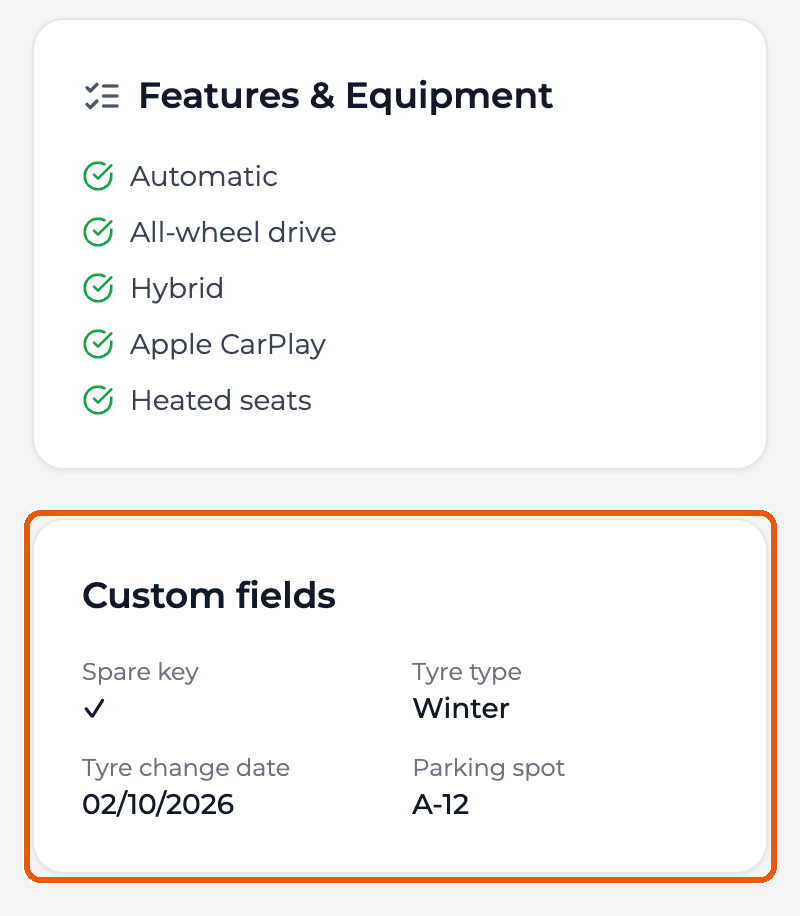
The Custom fields card sits under Features & Equipment. It is read-only.
The card only lists fields that have a value for this vehicle, and it disappears when there are none. An unticked checkbox counts as no value.