Add and manage columns
Only Admins can add, edit and remove columns. Members and Mechanics can fill in the cells.
Add a column
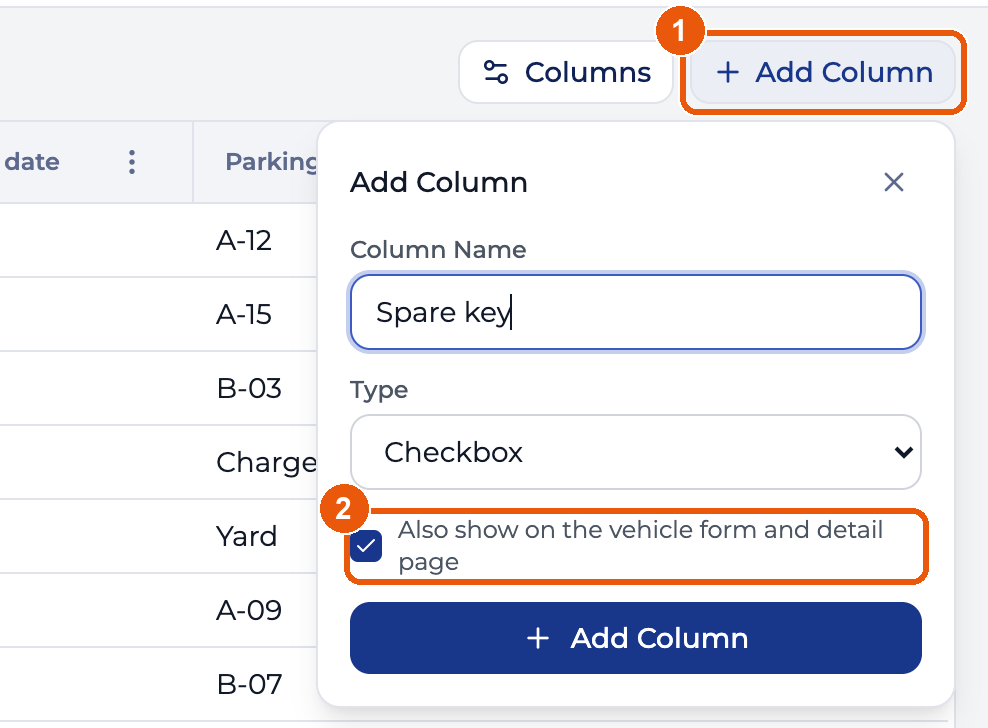
- Click Add Column in the top right of the grid, then give the column a name and a type.
- Tick Also show on the vehicle form and detail page if the column belongs on the vehicle itself. Leave it off to keep the column in the grid only. You can change this later.
Column types
| Type | What goes in the cell |
|---|---|
| Text | Anything you type |
| Number | A number |
| Link | A web address starting with http:// or https:// |
| Select | One value from a dropdown list |
| Checkbox | Ticked or not |
| Date | A date |
You can’t change a column’s type later. To switch, add a new column, copy the values over, and remove the old one.
Dropdown columns
Choose Select as the type and enter the options separated by commas.
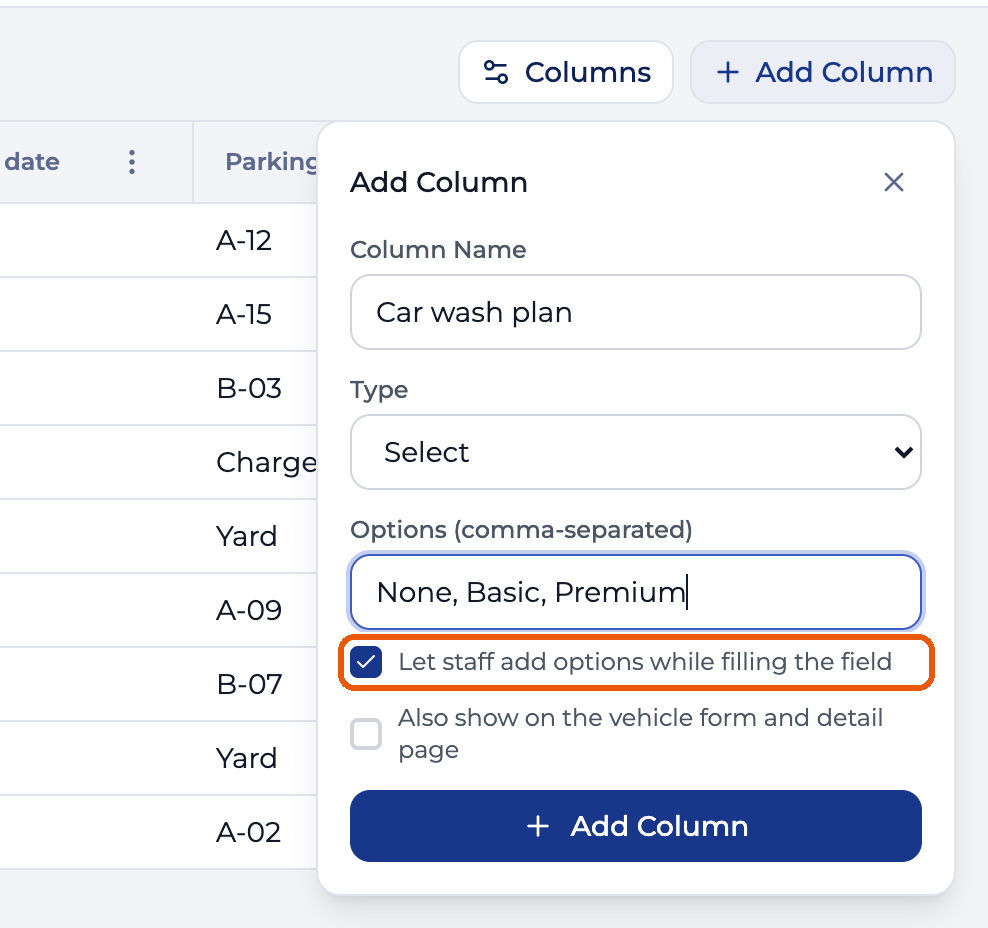
Let staff add options while filling the field decides whether the list can grow.
- Ticked. A value someone types that isn’t on the list is saved and added to the list for everyone.
- Unticked. Your team can only pick from the options you entered.
Start from a template
A grid with no columns offers three ready-made sets.

| Template | Columns it adds |
|---|---|
| Tire Management | Tire Type, Tire Change Date, Tire Brand, Tire Size, Tire Storage Location |
| Car Wash | Car Wash Subscription, Car Wash Provider, Car Wash Expiry |
| Parts Inventory | Spare Key, Key Fob Battery, Brake Pads, Oil Filter, Wiper Blades |
Template columns stay in the grid only, and the templates disappear once the grid has a column.
Edit a column
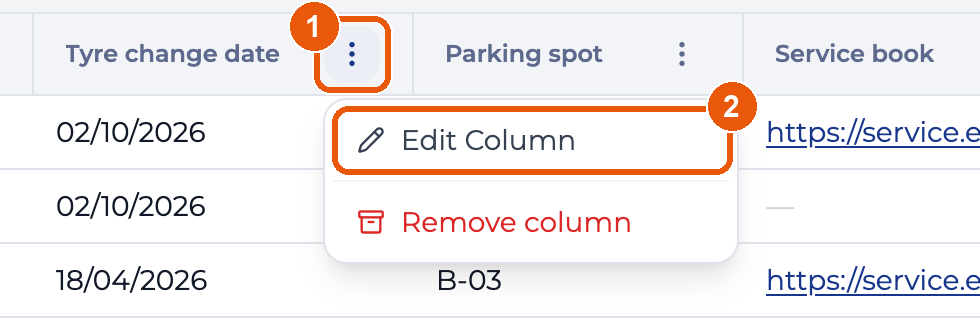
- Click the ⋮ at the right edge of the column’s header.
- Choose Edit Column.
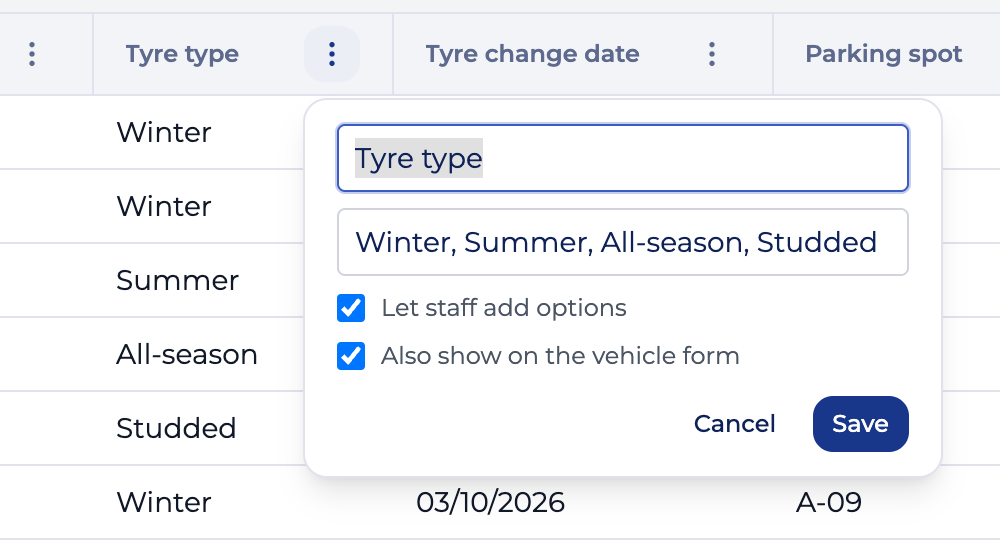
You can change the name, the dropdown options, and both checkboxes. Vehicles keep their values after a rename, and keep an option they were saved with even if you delete it from the list.
Reorder and resize
Drag a column header left or right to move it. The new order applies to your whole team.
Drag the right edge of a header to resize it. Double-click the edge to reset the width.
Show or hide columns
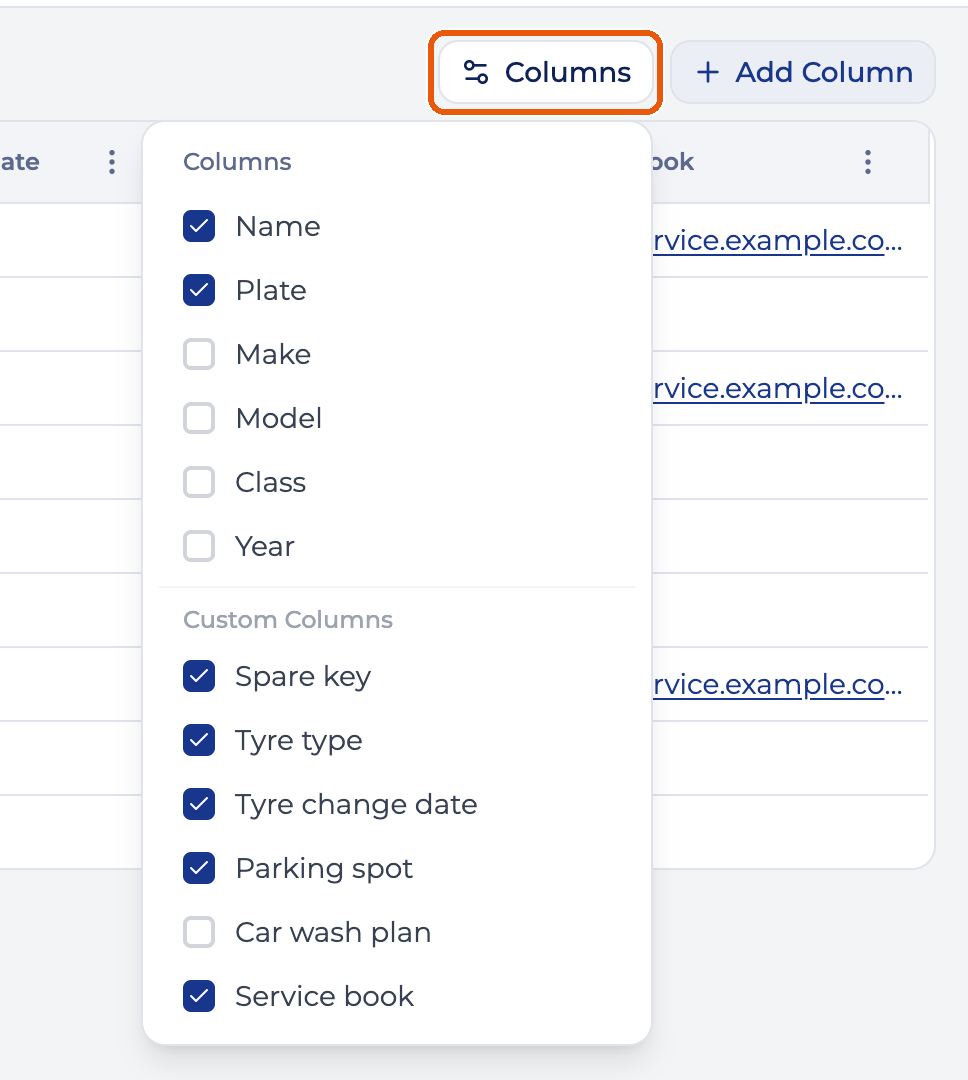
Click Columns and tick what you want to see. The top half lists the built-in vehicle columns, the bottom half your own.
This is saved in your browser. It doesn’t change what your teammates see, and hiding a column never deletes anything.
Remove a column
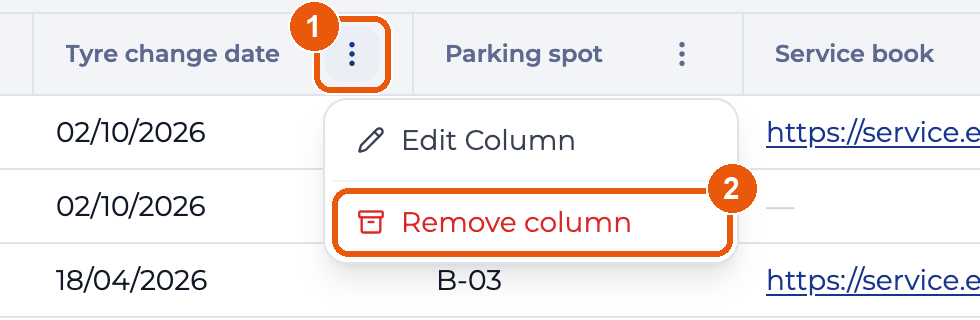
Click ⋮ in the column header, then Remove column.
Remove column acts the moment you click it. Nomora doesn’t ask you to confirm.
If no vehicle has a value in the column, Nomora deletes it. If any vehicle does, Nomora archives it instead, so nothing recorded is lost. An archived column stays in the grid, greyed out and read-only.
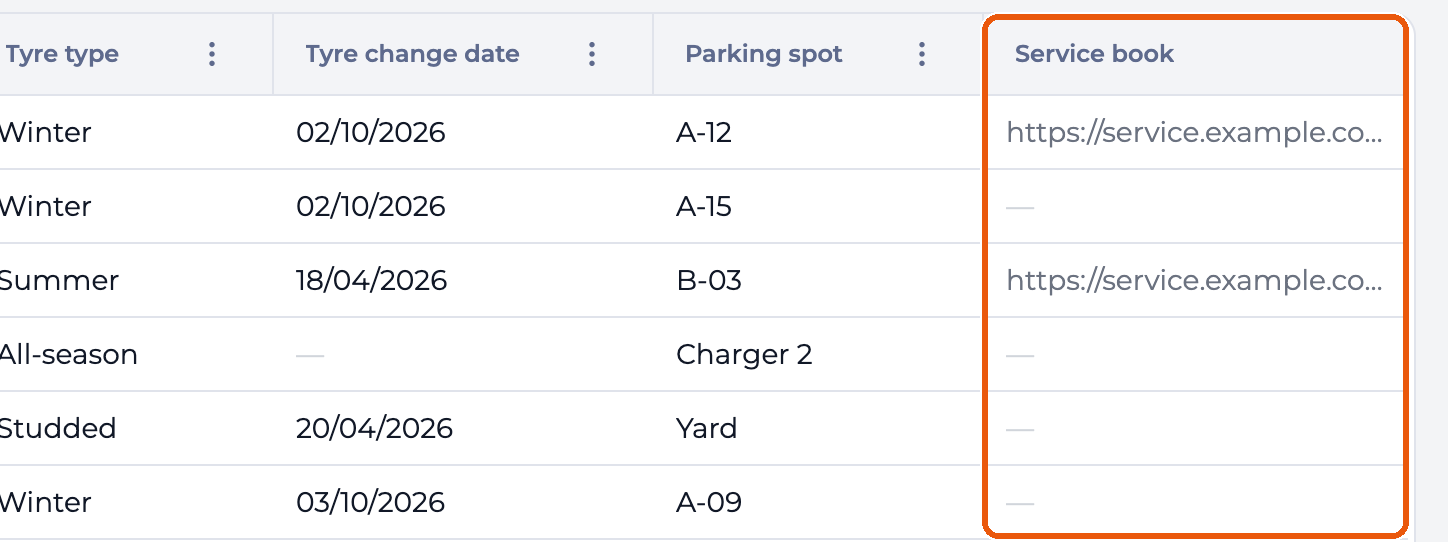
Restore an archived column
An archived column has no ⋮ menu, so you restore it from Settings.

Open Settings → Custom fields and scroll to the Vehicle custom fields card.
- Click Archived at the bottom of the card.
- Click Restore.