Equipment checklists
Use an equipment checklist if your team needs to record which items leave with a vehicle and which come back. It is an optional part of vehicle pickup and return. Keep one checklist for the whole fleet, or separate ones for different vehicle classes, such as one for campers and one for minibuses.
Set up a checklist
- Open Settings → Custom fields → Equipment checklists.
- Enter an item, such as a charging cable, and click Add. Repeat for the equipment your team checks.
- Use the arrows to reorder items or the bin button to remove an item.
- Click Save.
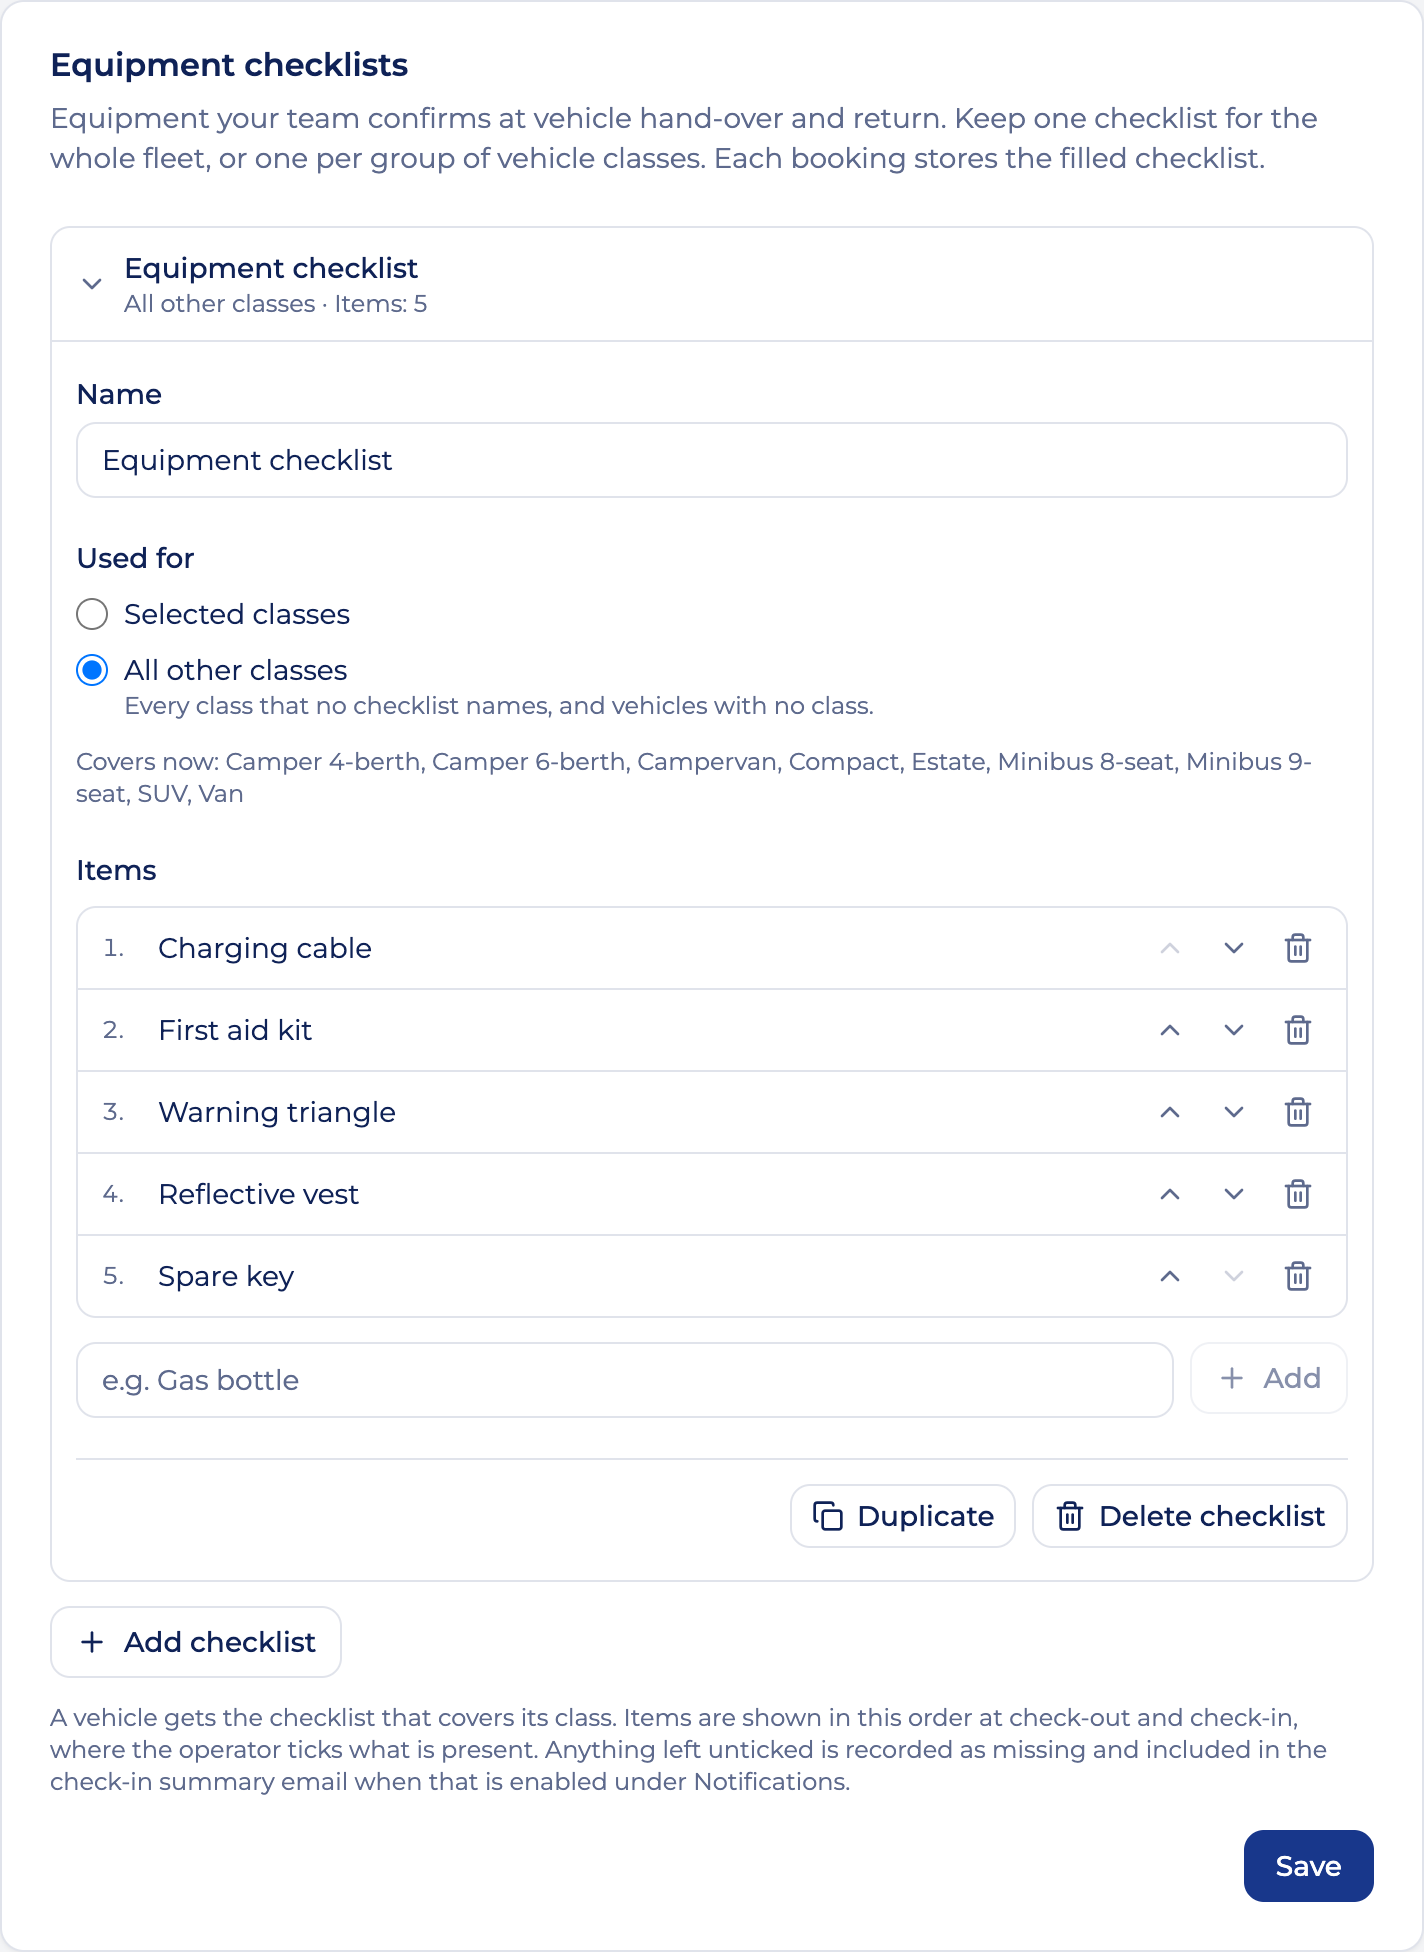
Your first checklist is used for All other classes, which with one checklist means every vehicle. You can add up to 100 items to a checklist. Checklists work independently of the email notifications.
Use different checklists for different vehicles
A vehicle gets the checklist that covers its class.
- Click Add checklist and give it a name, such as Campers. To start from the items of a checklist you already have, open that one and click Duplicate instead.
- Under Used for, keep Selected classes and tick the classes this checklist is for. The search narrows the list, and Tick all shown ticks every class the search found.
- Add or remove items, then click Save.
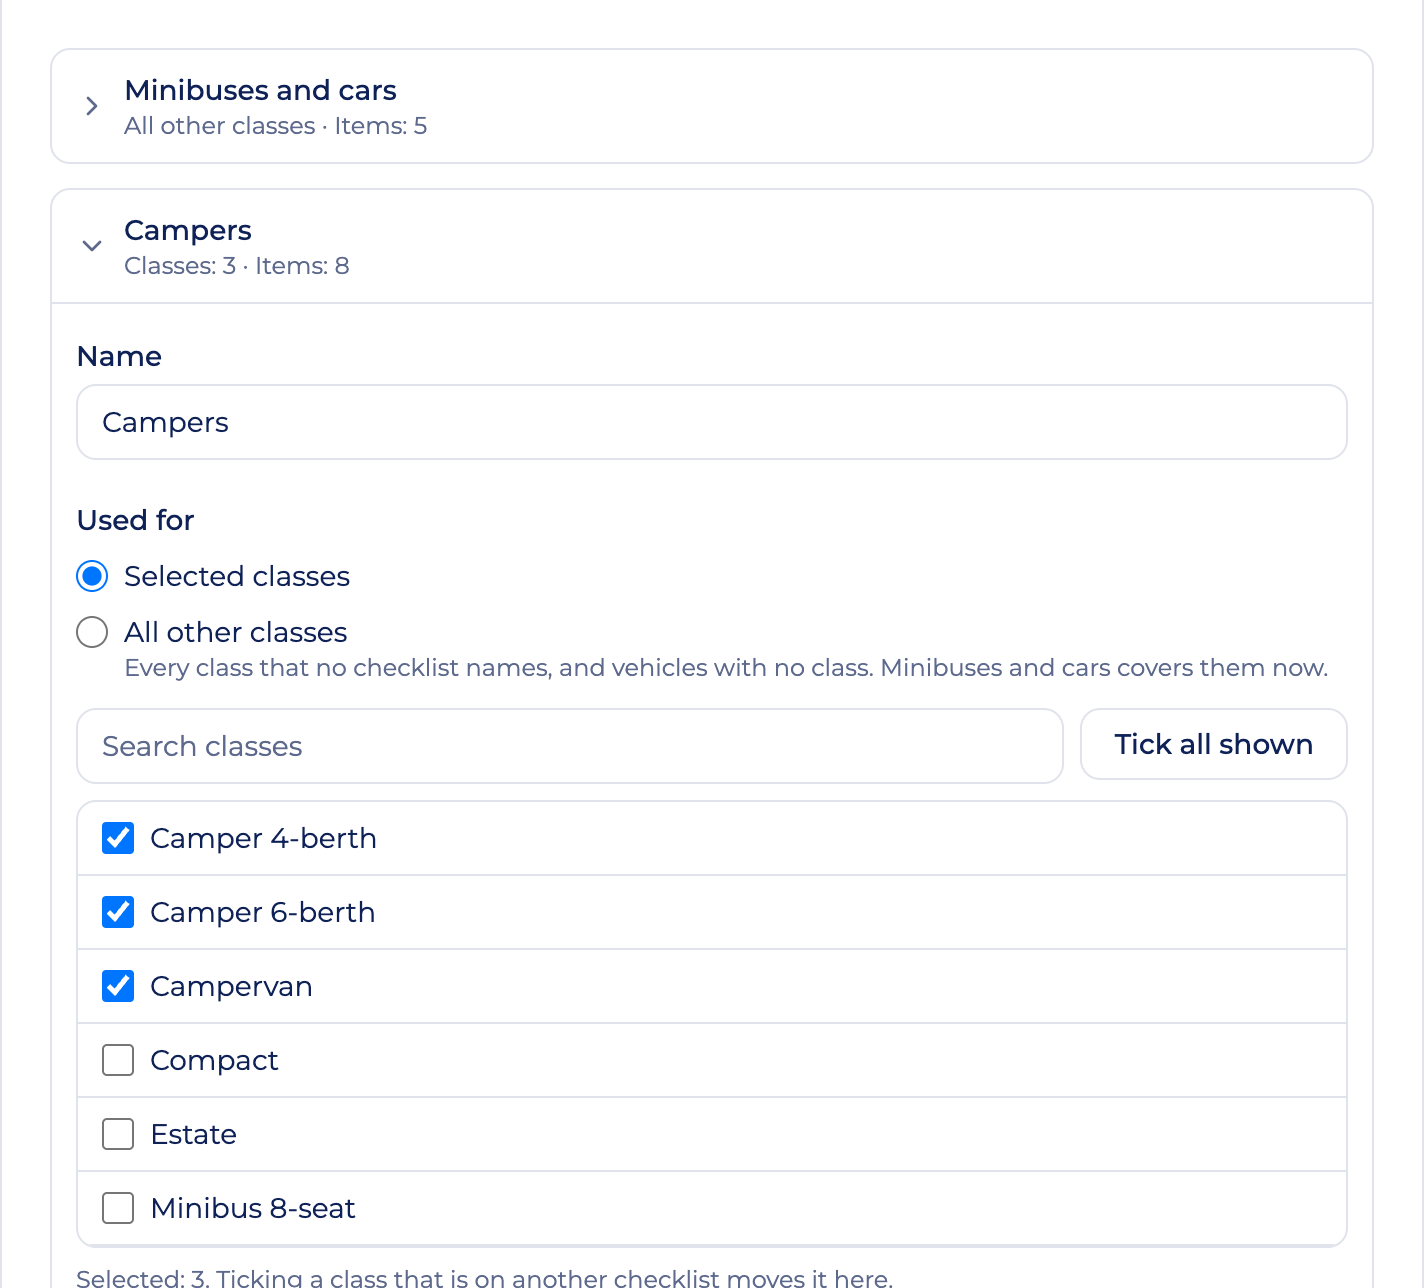
A class can be on one checklist. Ticking a class that is on another checklist moves it.
One checklist can be used for All other classes. It covers every class that no other checklist names, and vehicles with no class. It shows the classes it covers now. A class you add to your fleet later lands there until you tick it on another checklist, so check that list when you add one.
If no checklist is used for All other classes, vehicles in the remaining classes have no equipment step at pickup or return. Settings names those classes below the checklists.
You can keep up to 20 checklists. Deleting a checklist, or moving a class to another one, does not change bookings that already have a saved list.
At pickup
The equipment step of Check Out shows the checklist that covers the booking’s vehicle, under the checklist’s name. Tick each item you hand over. Use Tick all when everything is present, and add notes for any exceptions. Unticked items are recorded as missing at pickup. Complete checkout to save the filled list on the booking.
At return
Tick each item that came back. Unticked items are recorded as missing. Use the confirmed/missing count to review the list and add notes about any exceptions.
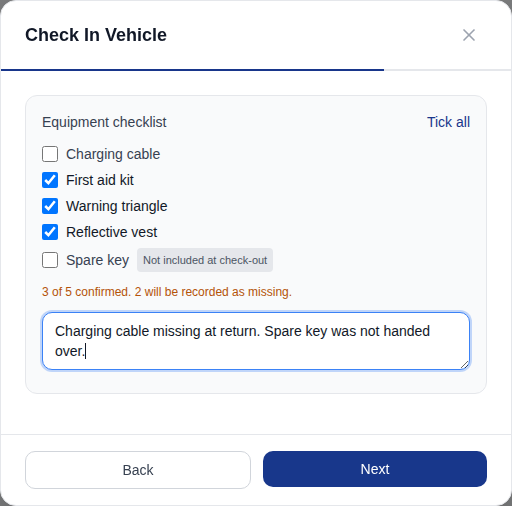
The return uses the list saved at pickup, even if someone adds or removes items in settings during the rental, or moves the vehicle’s class to another checklist. An item missing at pickup is labelled Not included at check-out, and the summary email identifies it as not handed over. If the booking has no saved pickup checklist, the vehicle’s current checklist is used.
For example, if a charging cable was handed over but the spare key was not, leaving both unticked at return records the cable as missing and identifies the spare key as not included at pickup.
If you want missing equipment included in an internal summary, configure emails after check-in.